 I've pretty much cemented how I'm getting the blue done on infantry. As I said before blue is my least favourite colour to paint. I'm airbrushing the base coat and two zenithal highlights, then adding a couple of shades and highlights with a brush to finish.
I have to say I don't know why people slate these models, they've got so much character, especially the sergeant. I'm gonna try and paint them in batches of 3, and do the sergeant separately. So far definitely my favourite warmachine unit.
I've pretty much cemented how I'm getting the blue done on infantry. As I said before blue is my least favourite colour to paint. I'm airbrushing the base coat and two zenithal highlights, then adding a couple of shades and highlights with a brush to finish.
I have to say I don't know why people slate these models, they've got so much character, especially the sergeant. I'm gonna try and paint them in batches of 3, and do the sergeant separately. So far definitely my favourite warmachine unit.
Friday, 8 June 2012
Stormguard WIP
So Lynch has taken a tiny back seat, I have very little left to do on him, but like a child I got excited when my Stormguard unit arrived in the post, and couldn't wait to get started on them.
 I've pretty much cemented how I'm getting the blue done on infantry. As I said before blue is my least favourite colour to paint. I'm airbrushing the base coat and two zenithal highlights, then adding a couple of shades and highlights with a brush to finish.
I have to say I don't know why people slate these models, they've got so much character, especially the sergeant. I'm gonna try and paint them in batches of 3, and do the sergeant separately. So far definitely my favourite warmachine unit.
I've pretty much cemented how I'm getting the blue done on infantry. As I said before blue is my least favourite colour to paint. I'm airbrushing the base coat and two zenithal highlights, then adding a couple of shades and highlights with a brush to finish.
I have to say I don't know why people slate these models, they've got so much character, especially the sergeant. I'm gonna try and paint them in batches of 3, and do the sergeant separately. So far definitely my favourite warmachine unit.
I've pretty much cemented how I'm getting the blue done on infantry. As I said before blue is my least favourite colour to paint. I'm airbrushing the base coat and two zenithal highlights, then adding a couple of shades and highlights with a brush to finish.
I have to say I don't know why people slate these models, they've got so much character, especially the sergeant. I'm gonna try and paint them in batches of 3, and do the sergeant separately. So far definitely my favourite warmachine unit.

Monday, 4 June 2012
Lynch WIP
Here's a WIP shot of Captain Dixon Lynch, leader and final member of the Black 13th. Once again my camera-fu is weak, but it's the best I could manage. I tried to get his stubble right, I'm pretty happy with it so far. All I need to do is his boots, his weapon, and add a couple of red and off-green glazes around the bridge of his nose to give him a slightly miffed look.
 And the B13's group shot as they stand so far
 I've ordered a unit of Stormguard next, hopefully they'll turn up just as I'm finishing Lynch, but having all my stuff painted so far as opposed to string at a sea of undercoated models is a wonderful feeling.
 And the B13's group shot as they stand so far
 I've ordered a unit of Stormguard next, hopefully they'll turn up just as I'm finishing Lynch, but having all my stuff painted so far as opposed to string at a sea of undercoated models is a wonderful feeling.
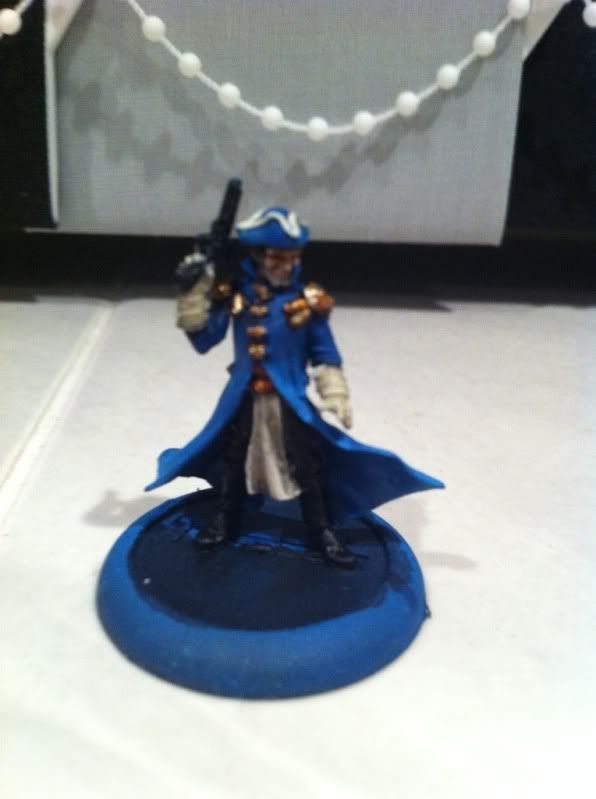
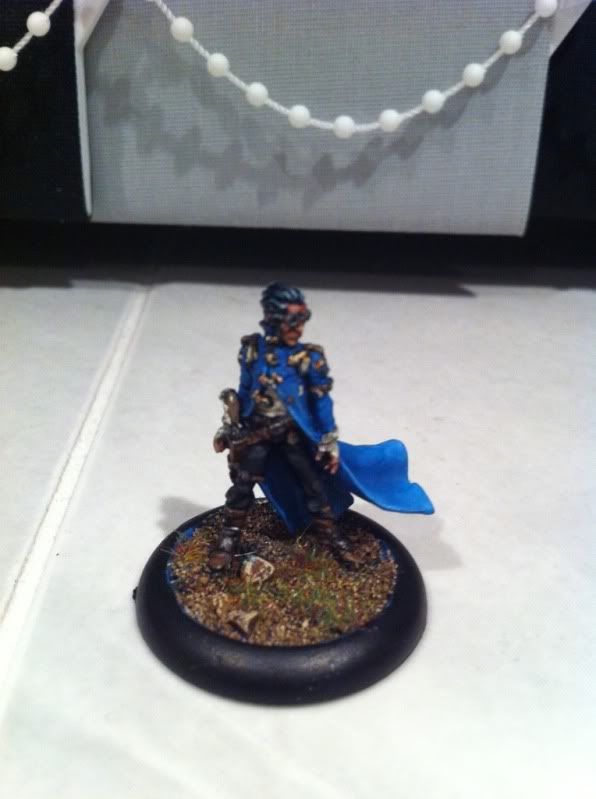
Sergeant Samuel Watts
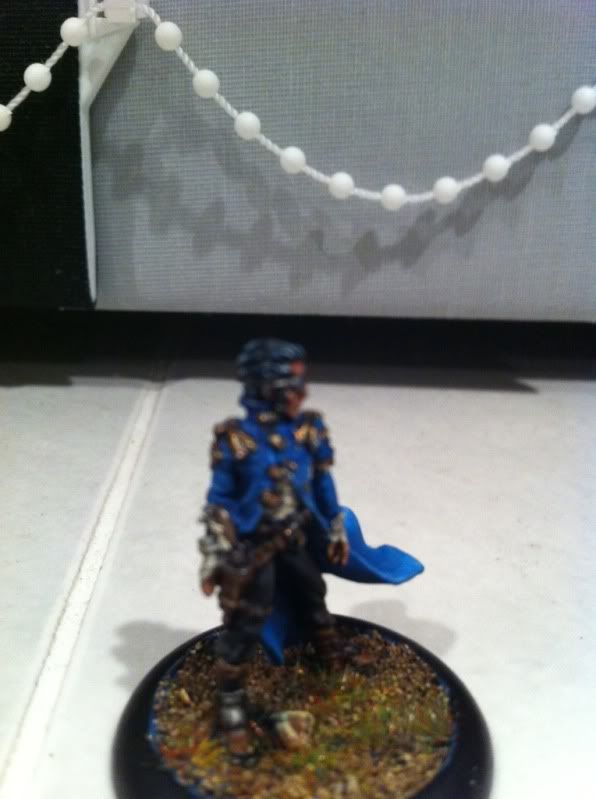
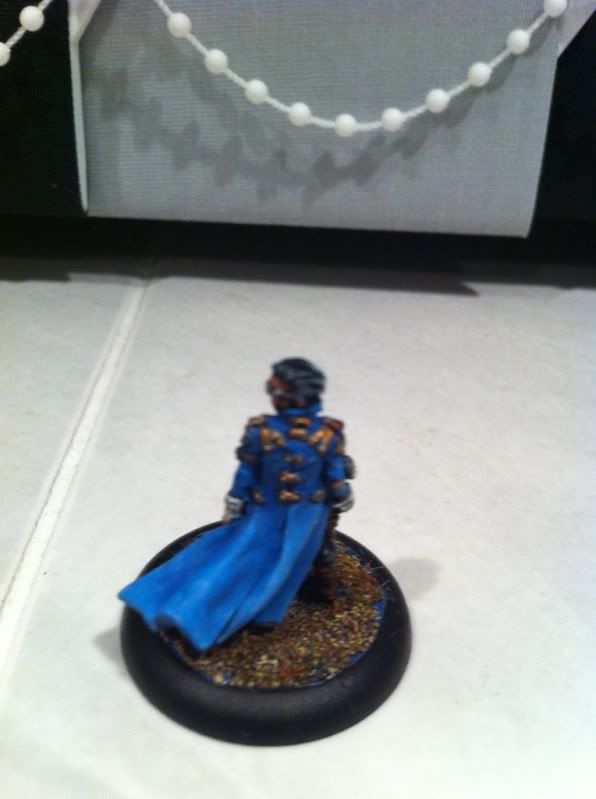
So, continuing with the Black 13th, here's Watts. I really love the posing of this model. It really looks like he's daring someone to draw on him. I hate painting black hair, but once again handcannon online came to the rescue with an excellent article. Which I tried my best to follow and adapt.
I'm getting these guys done at a rate of about one evening (5 hours) per model, which is about a quarter of the time I usually spend on a character model, but I'm really enjoying just having them painted. It helps with the motivation.
I'm pretty happy with how the blue turned out, the photo also doesn't really show the black trousers well, but they look decent in the flesh. Excuse the wierd blue bits on the base, I didn't notice these till I took the photos and have since been rectified!


Friday, 1 June 2012
Cygnar progress
So, my speed painting seems to have levelled up, but my photography is still iPhone-woeful. Still, here's the progress
Captain Arlan Strangeways

And Black 13th Gun Mage Ryan.

I decided to kinda reverse the colour scheme on these, as I want the blue to run across the whole force. I've done the inner clothing black to represent the 'black' 13th. Here's my secret: I hate painting blue. This army is a kind of test for me. I want to improve my speed painting, and also my ability to paint blue. That's why this army is straight outta the box, no conversions, no crazy bases. Just on the table swiftly
Hope it works out...
Captain Arlan Strangeways
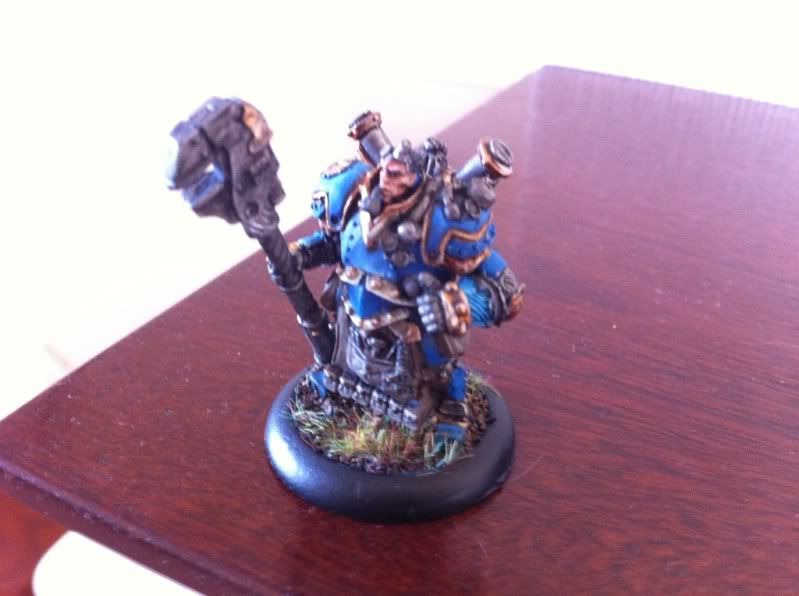
And Black 13th Gun Mage Ryan.
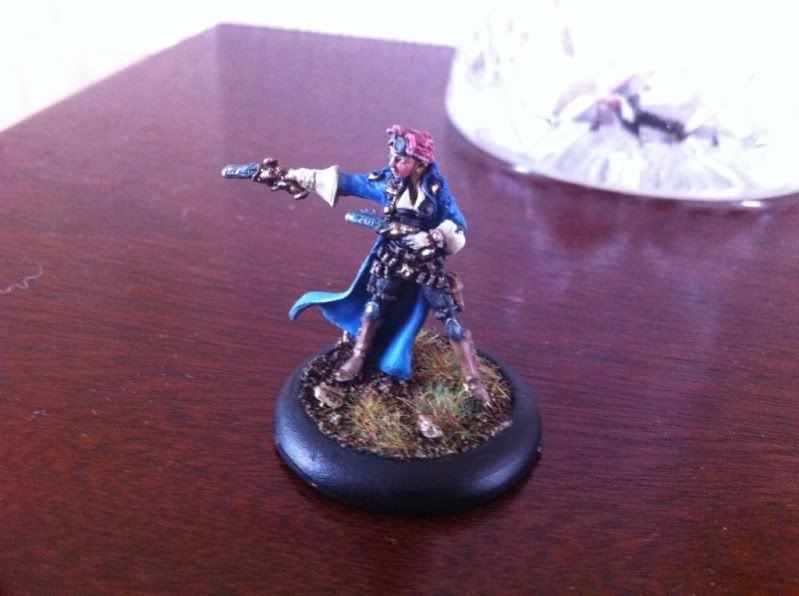
I decided to kinda reverse the colour scheme on these, as I want the blue to run across the whole force. I've done the inner clothing black to represent the 'black' 13th. Here's my secret: I hate painting blue. This army is a kind of test for me. I want to improve my speed painting, and also my ability to paint blue. That's why this army is straight outta the box, no conversions, no crazy bases. Just on the table swiftly
Hope it works out...
Thursday, 24 May 2012
Unplanned purchases
Tomorrow I'm going to do something I haven't done since I was about 10. I'm going to go to the store, and I'm just gonna buy some models, and I don't know what they are, I'll just browse and decide when I get there.
Wednesday, 23 May 2012
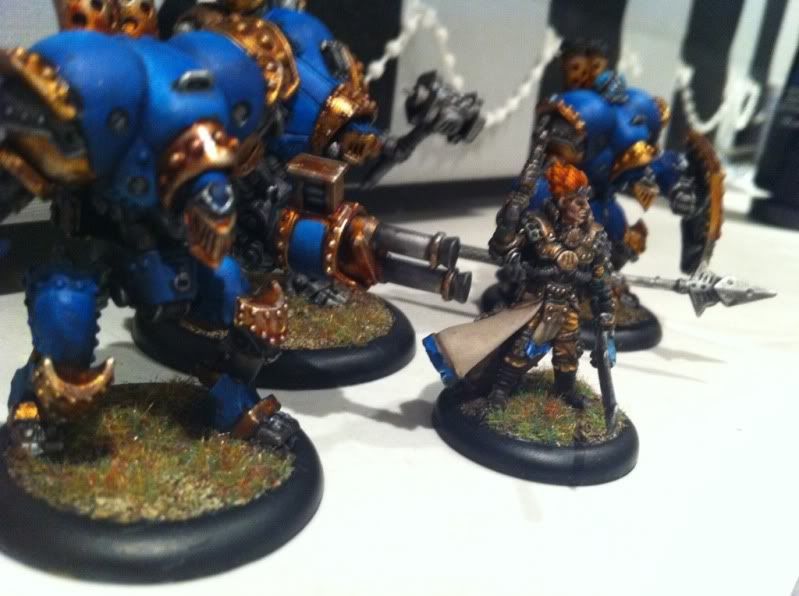
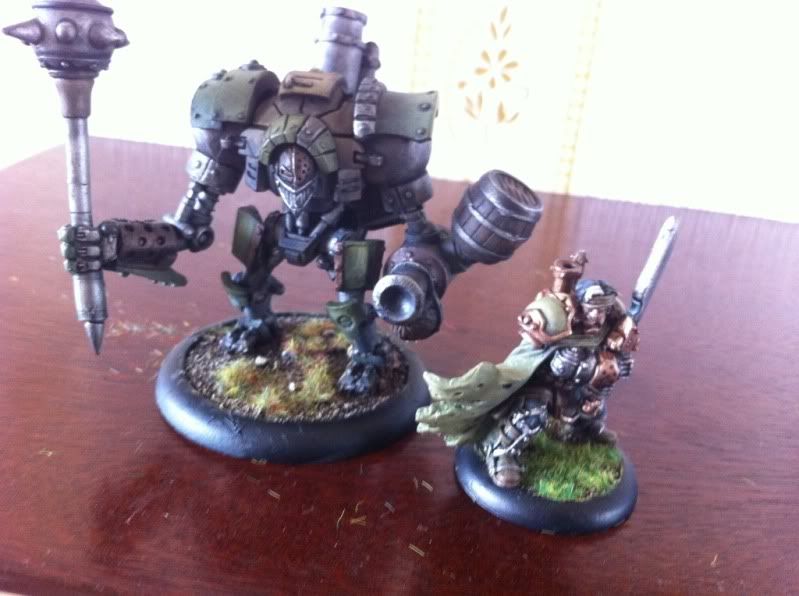
And finally, I admitted to myself that I like Warmachine. I decided on Cygnar, and I've had some issues with the blue, but I think I'm getting it now. I started with a battlebox, as that seems sensible. Also, I've got into airbrushing. I dug out an old mercenary mule that I have no recollection of buying, and mercenary warcaster Magnus the traitor. This was my first attempt at airbrushing, it's a lot of fun to do.


 I'm Gonna pick up some more stuff this weekend, aiming for a 35 pt Cygnar Force
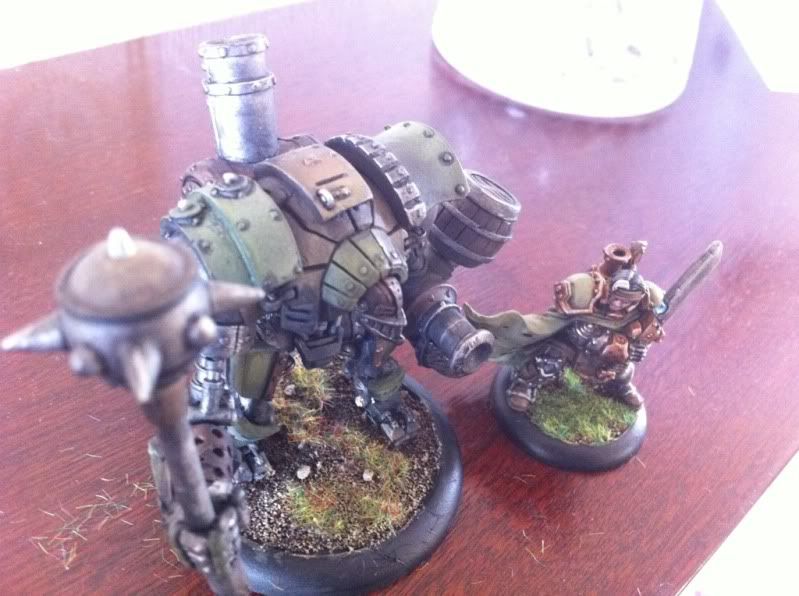
Painting roundup continued
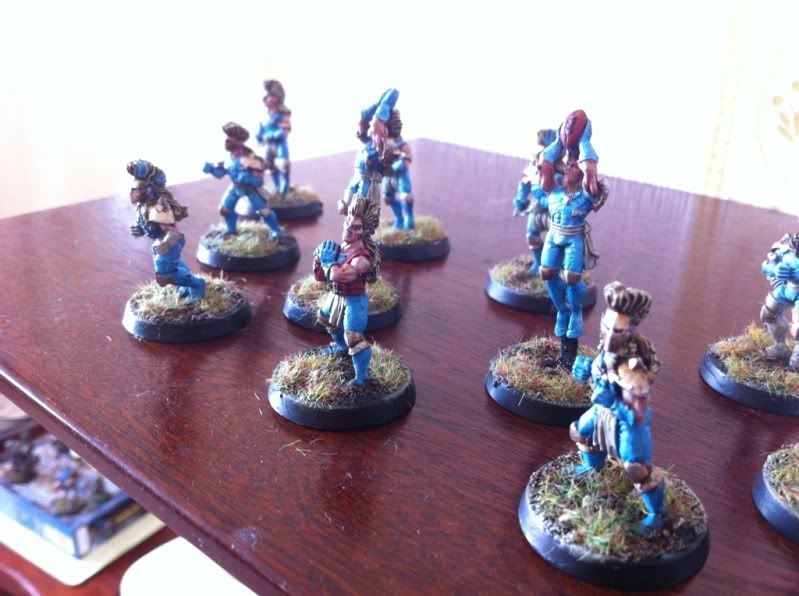
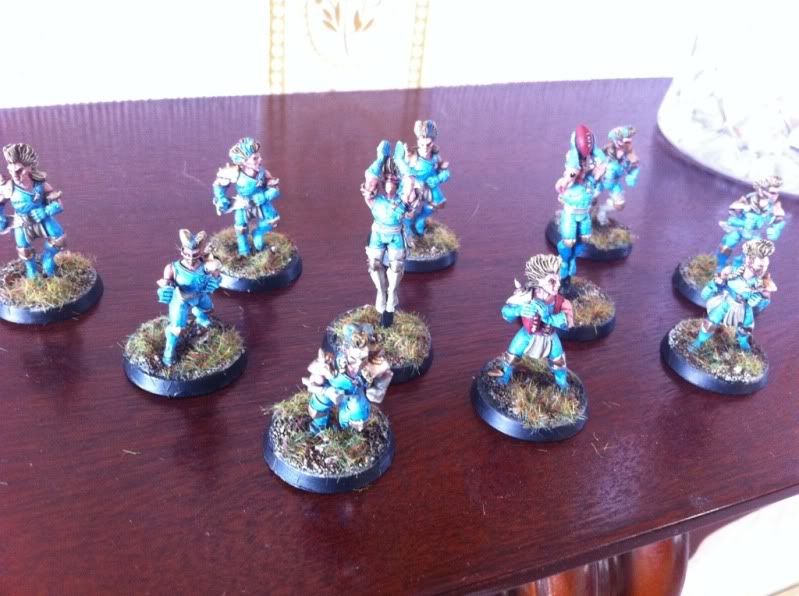
And my 5-hour Elf blood bowl team. I've been really getting into speed painting lately, getting stuff done to play with. Bit of a corner turned, you can spend years painting to the highest standard you can, or you can get stuff painted and gaming and still be happy with it. 5 hours start to finish, in anticipation of blood bowl being GW's splash release for 2012.

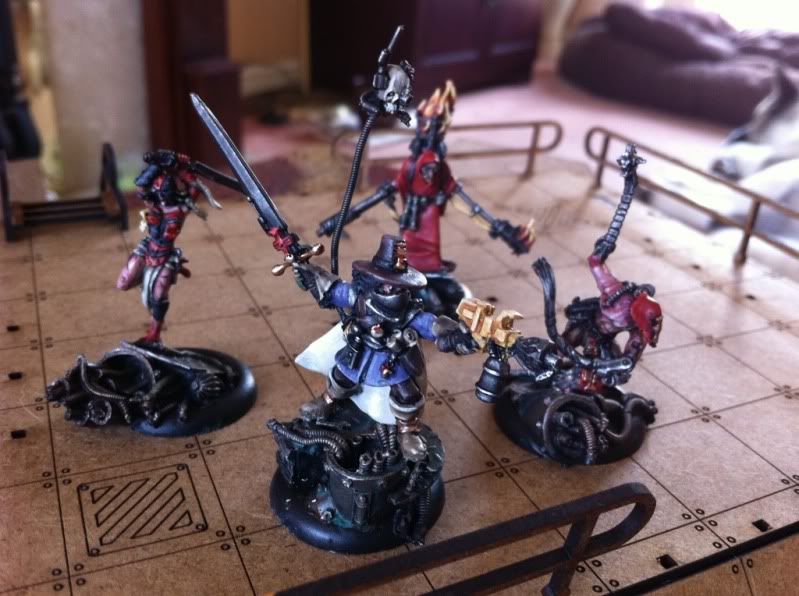
 Also, a couple of my Inquisimunda warbands. I painted a ton of these, but these were my favourites


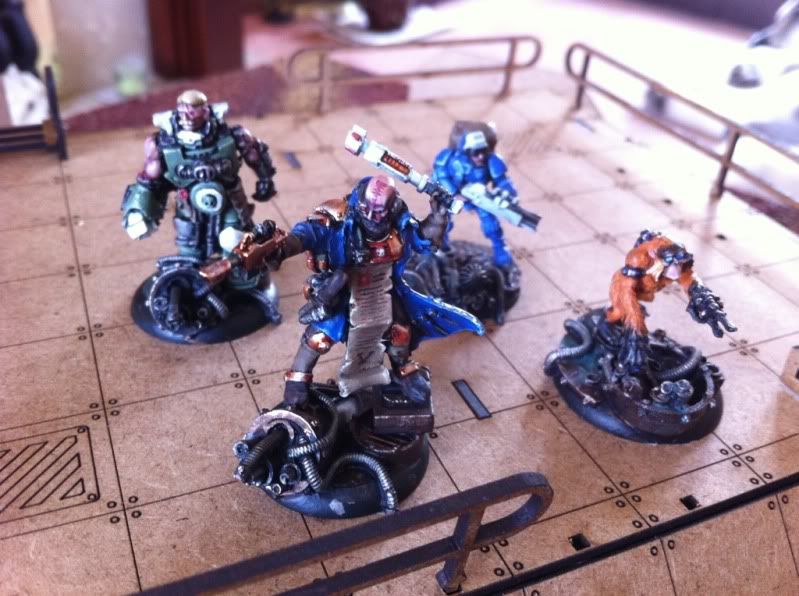
6 months without a post!
Well, it's been 6 months since I updated this! But. Havenott been idle, just on a ton of tangents. I've painted far too much to post so I'm just gonna throw up some images from my phone


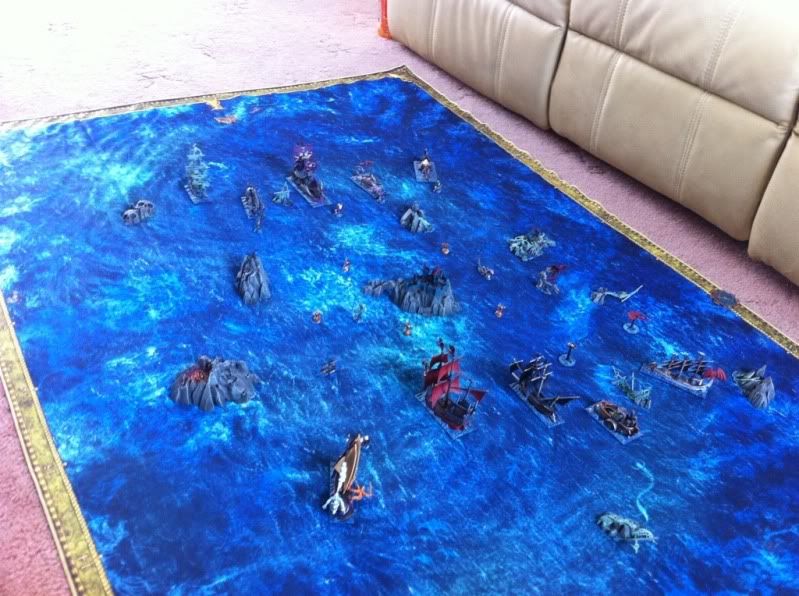
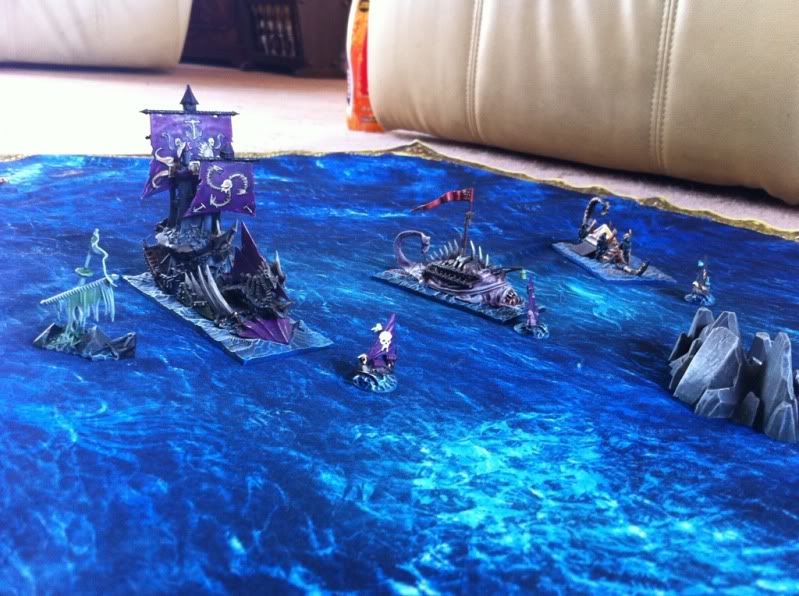
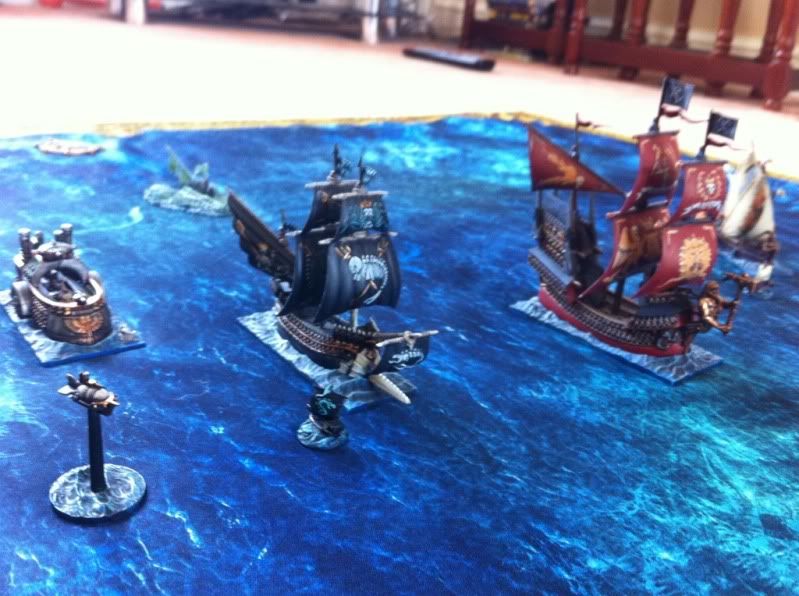
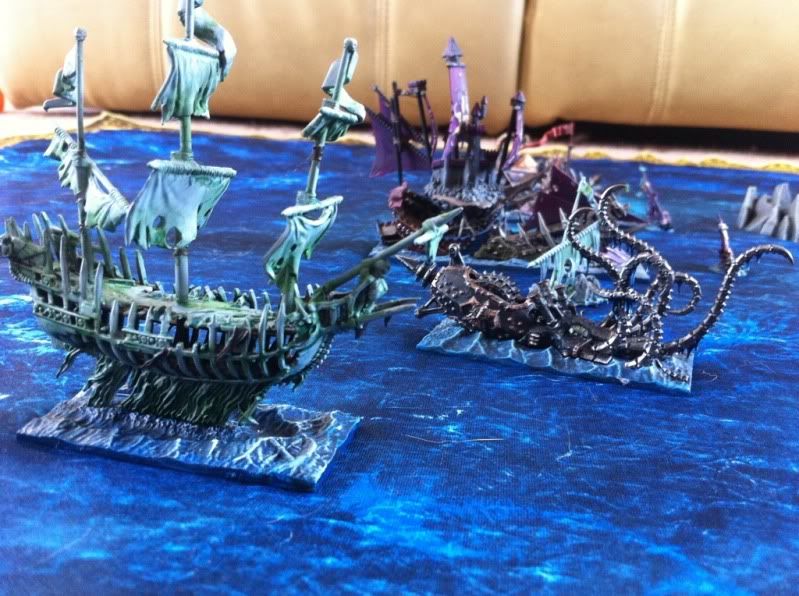
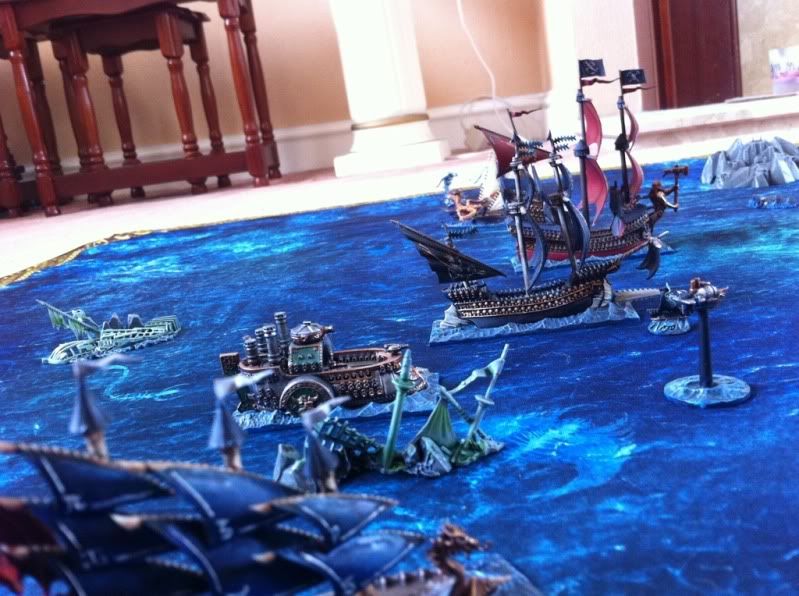
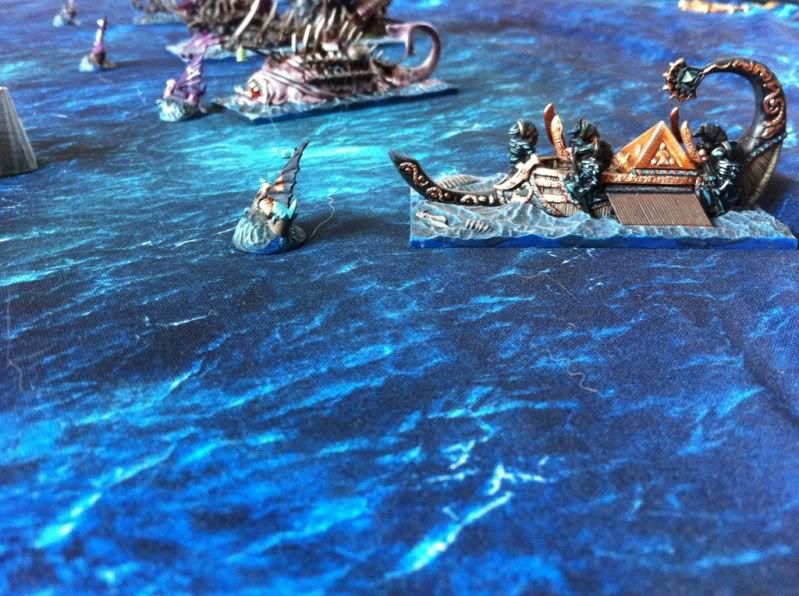
 So I finished my dreadfleet. Hopefully gonna be able to play through the dreadfleet campaign
Thursday, 3 November 2011
The Heldenhammer
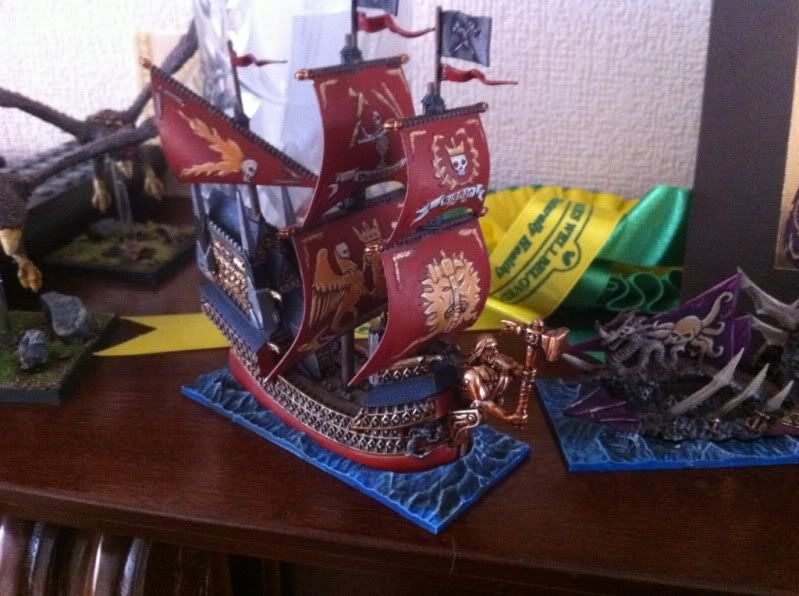
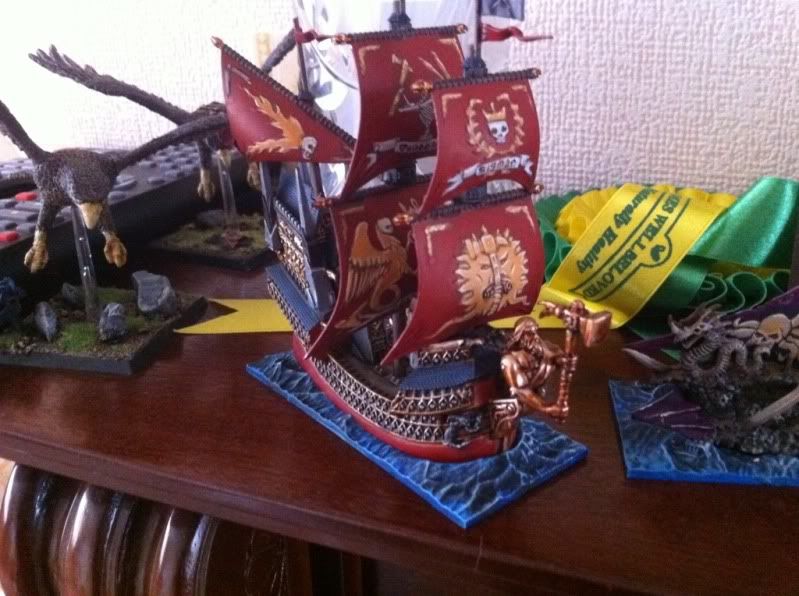
The ship of captain Roth himself! Much happier with this one. I really like the red, which was much simpler than the way I usually paint red. I'm tempted, if I'm not sick of ships by the time this is all done, to repainted my Battlefleet Gothic stuff in this colour
Incase you haven't noticed, I've denied myself the pleasure of painting my favourite ships first (the Swordfysh and the Skarbrus). Instead, I'm working strictly through what I'll need for each scenarion, in order.
For scenario 1, Corpse Reef, I need...
The Heldenhammer
The Bloody Reaver
The sea monsters
One Cog each (not useful in the scenario, unless you get a Powder ship)
The ruler
The turning markers
The Wind marker
The islands and shipwrecks
More soon
The Bloody Reaver
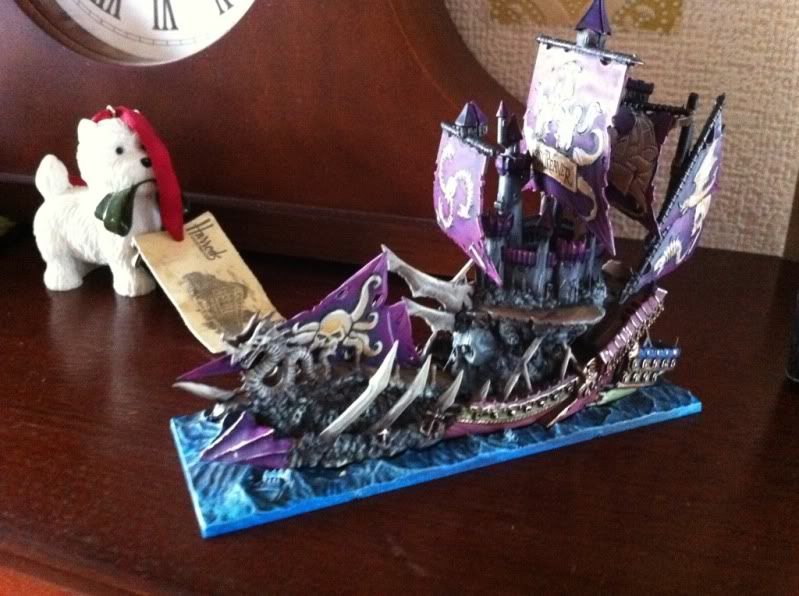
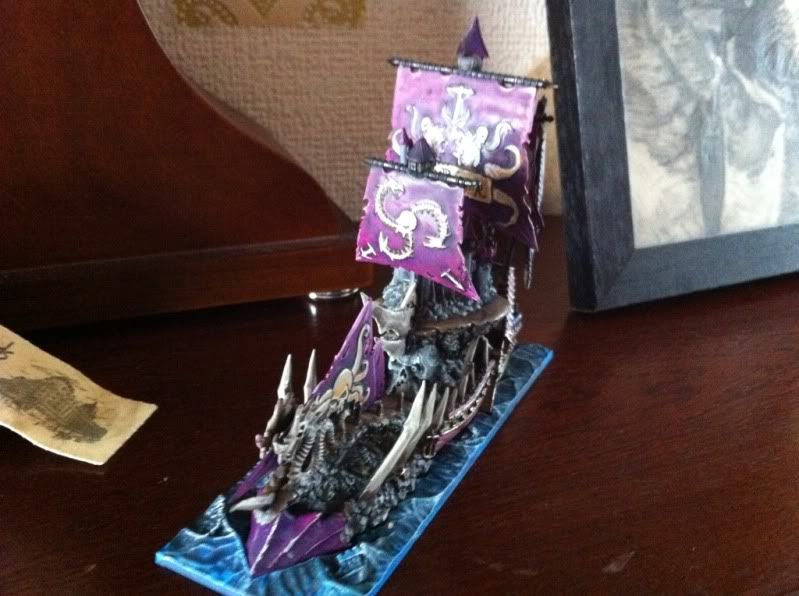
Not entirely happy with how it came out, but it'll do. I wanted to use more purple than the painting guide, even though it's meant to be a mish-mash of wrecked ships, I still wanted it to be identifiable from the other side of the ocean. I found the embossed sail details difficult to get right, but towards the end I was starting to get it, so hopefully the next ship will be better.
Dreadfleet
Yarrrgh!
It's Pirate time! I bought myself Dreadfleet as a treat.

The quality of the stuff in this game is incredible. I'm not going to be painting them to a display standard, however. It's a standalone game, for playing games with. So I'm going to paint it to a decent gaming standard.
It's Pirate time! I bought myself Dreadfleet as a treat.
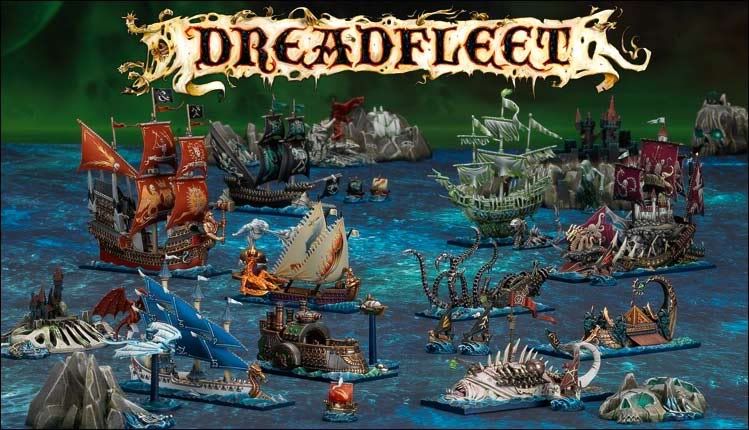
The quality of the stuff in this game is incredible. I'm not going to be painting them to a display standard, however. It's a standalone game, for playing games with. So I'm going to paint it to a decent gaming standard.
Tuesday, 1 November 2011
Poor neglected blog...
...I've been updating forums as opposed to this blog, so here's a summary of pics


Also, there's a battle report, which is Here
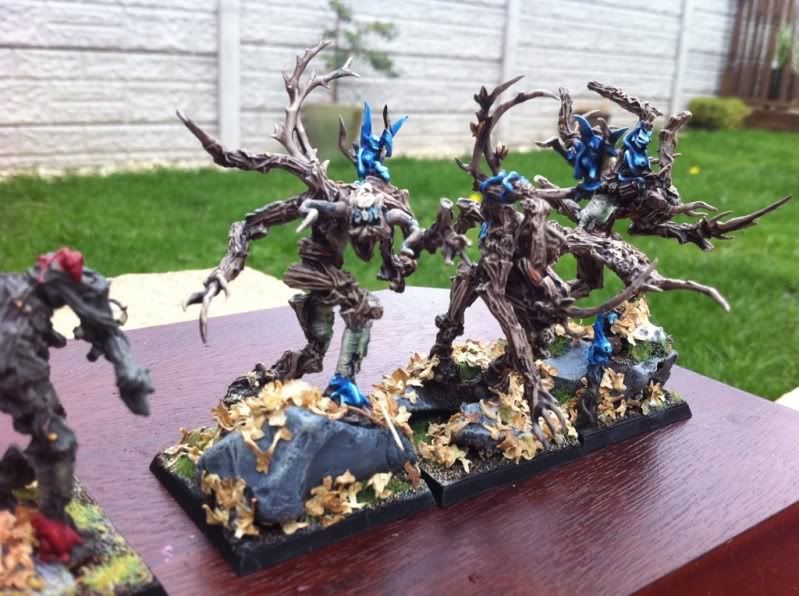
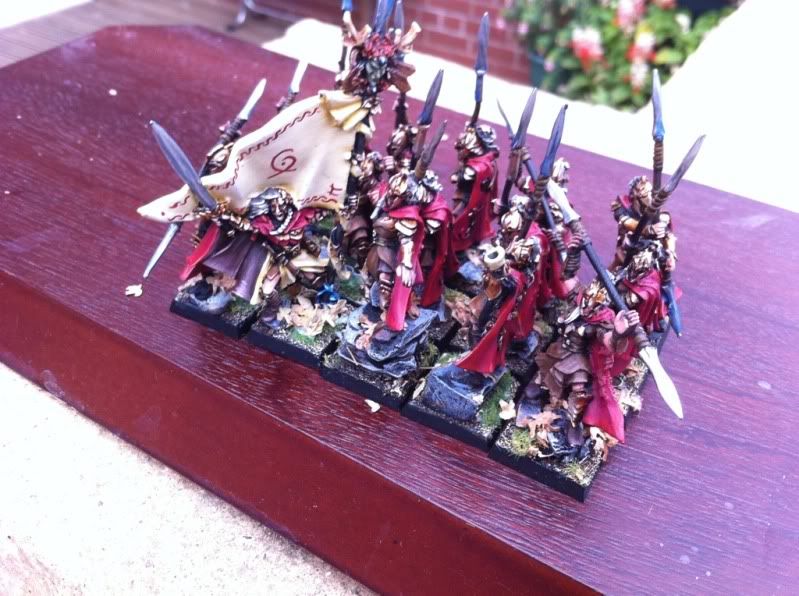
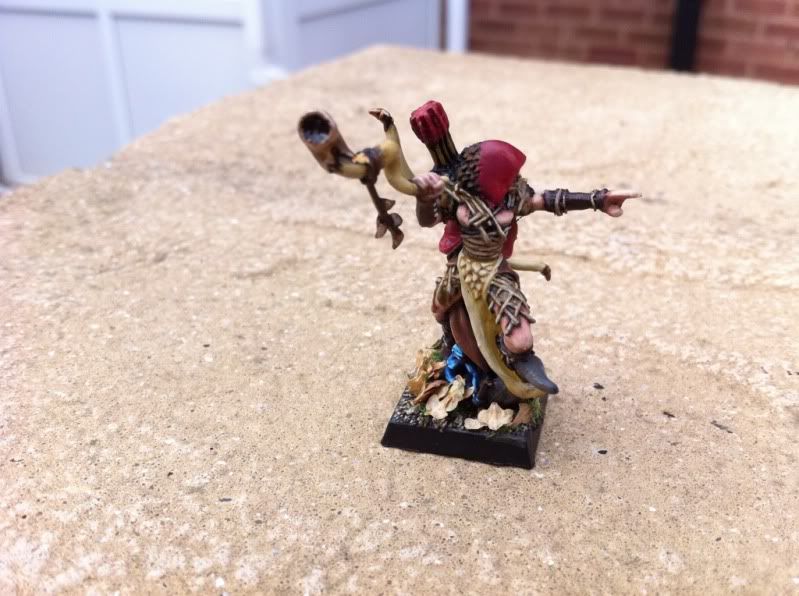
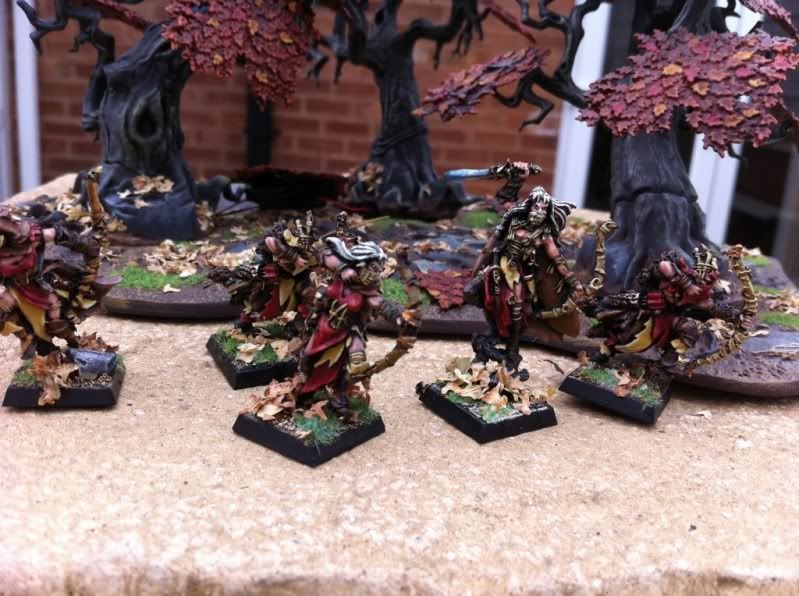
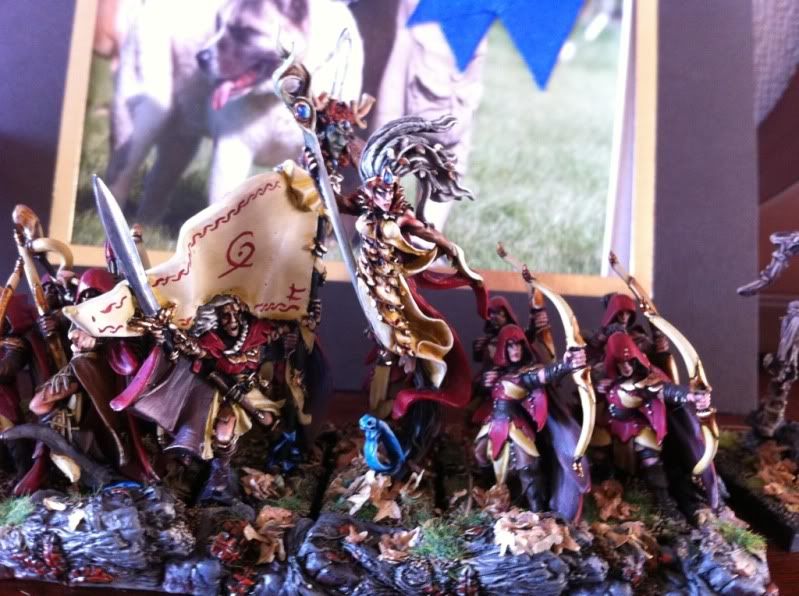
Also, there's a battle report, which is Here
Friday, 2 September 2011
Overcoming my fear of the treekin
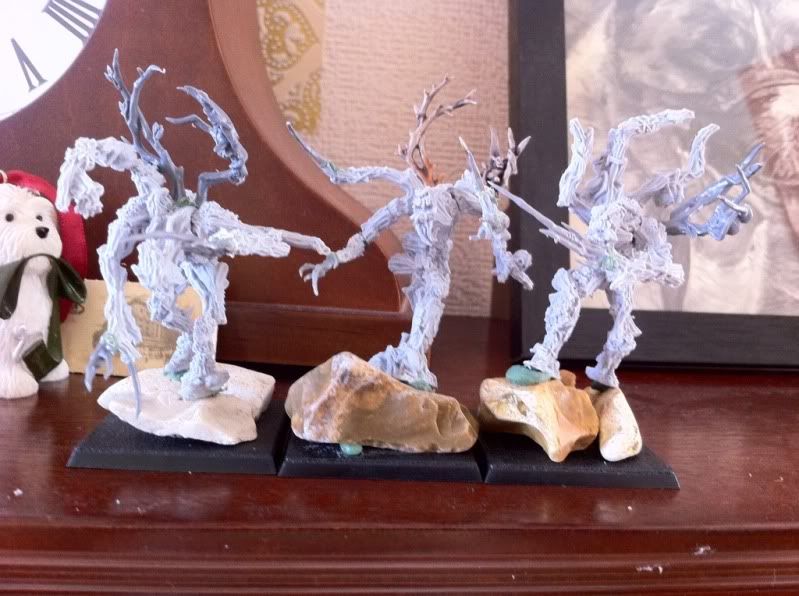
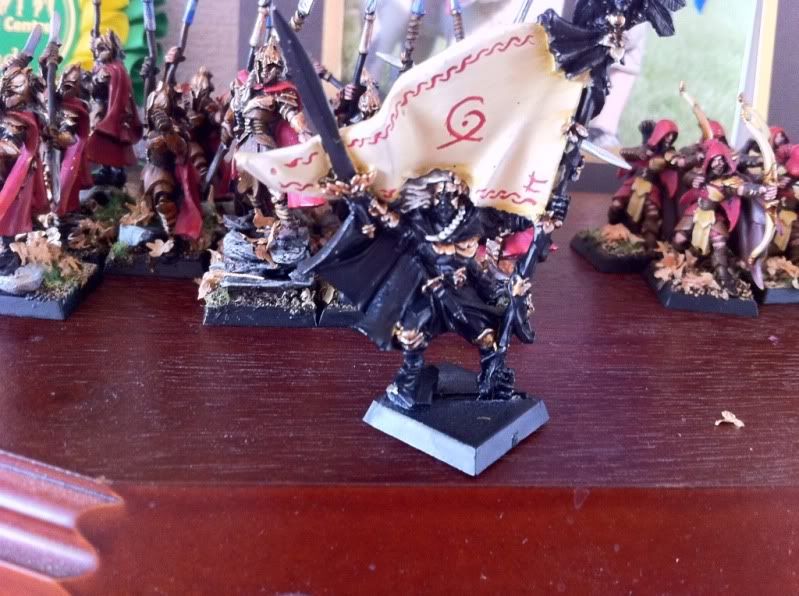
Treekin are awesome, both in rules and background, but I've never seen any where ive though: "yes, that looks ace"
I've done a teency bit of work on them and I think they look loads better, but the paintjob will determine how they turn out. All I've done is sharpen up their claws with sone dryad arms, and give them done height with some dryad branches

I've done a teency bit of work on them and I think they look loads better, but the paintjob will determine how they turn out. All I've done is sharpen up their claws with sone dryad arms, and give them done height with some dryad branches
Monday, 29 August 2011
Sunday, 28 August 2011
Progress report
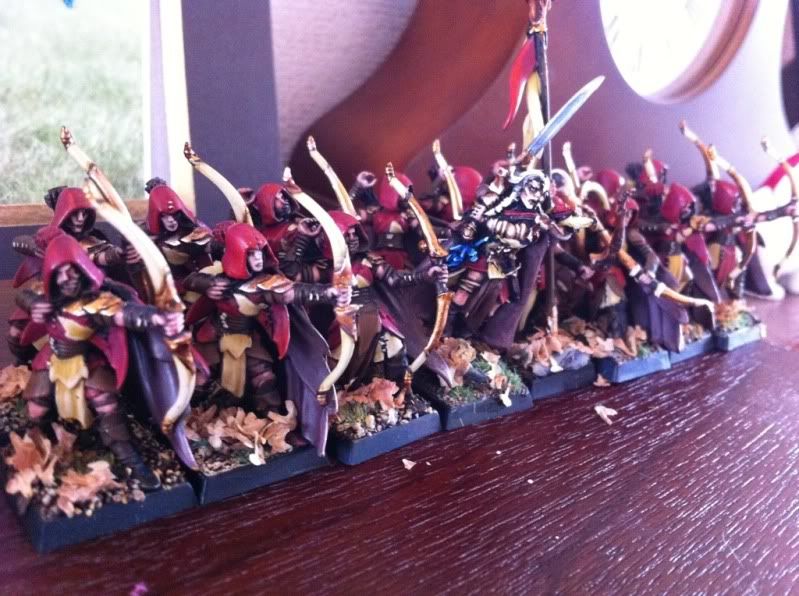
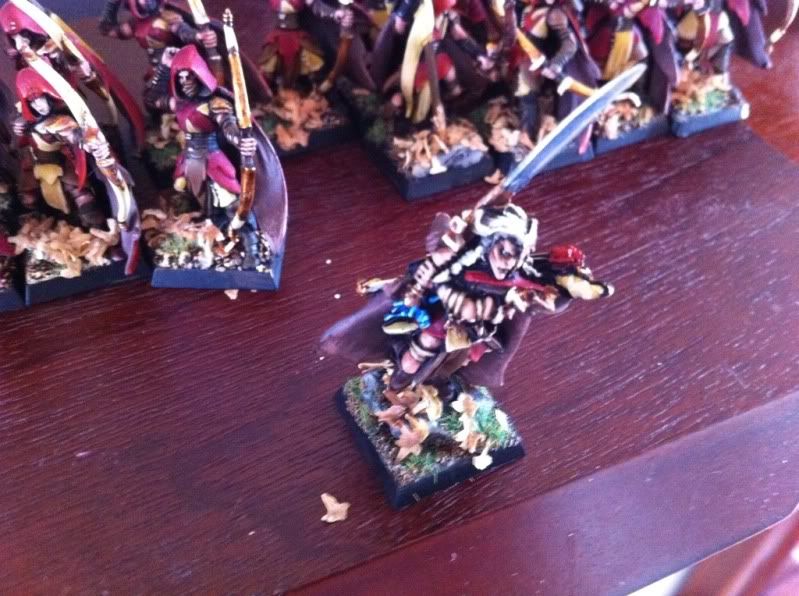
Just a bit of a progress report, I've painted a he'll of a lot today, it's late and dark but I took a few quick snaps anyway, await daytime pics tomorrow!
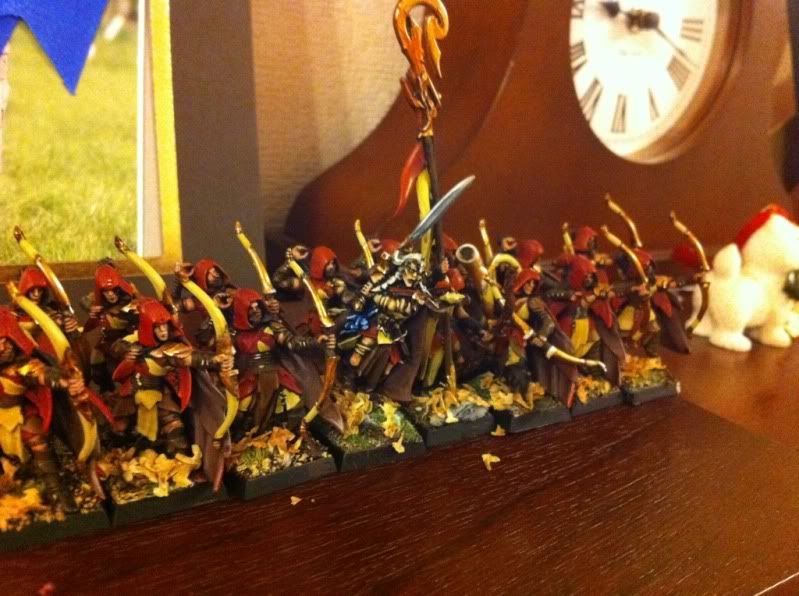
First, I've extended on of my units of glade guard from 10 to 16 strong, with command.

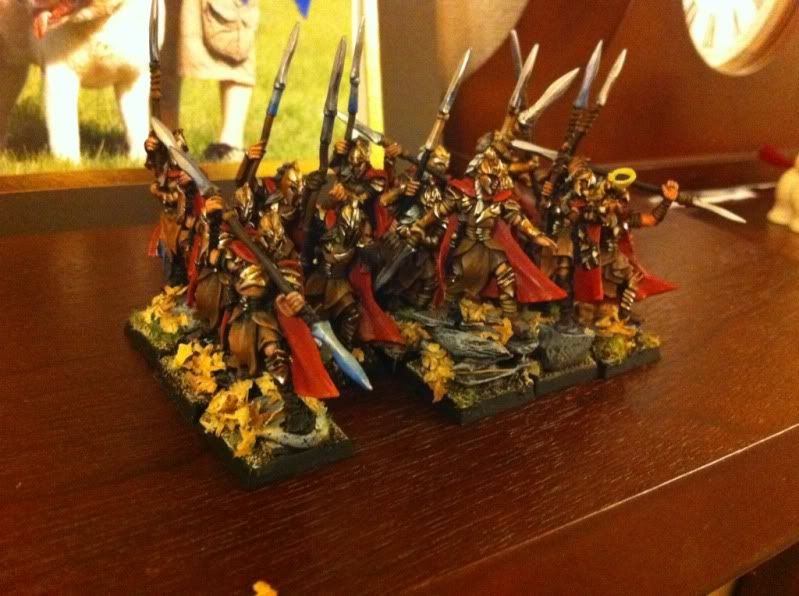
Also, 15 (actually 14 at the minute) eternal guard. 5 of these guys were the first models I painted for this army a few years back, hopefully you can't tell the new from the old too much

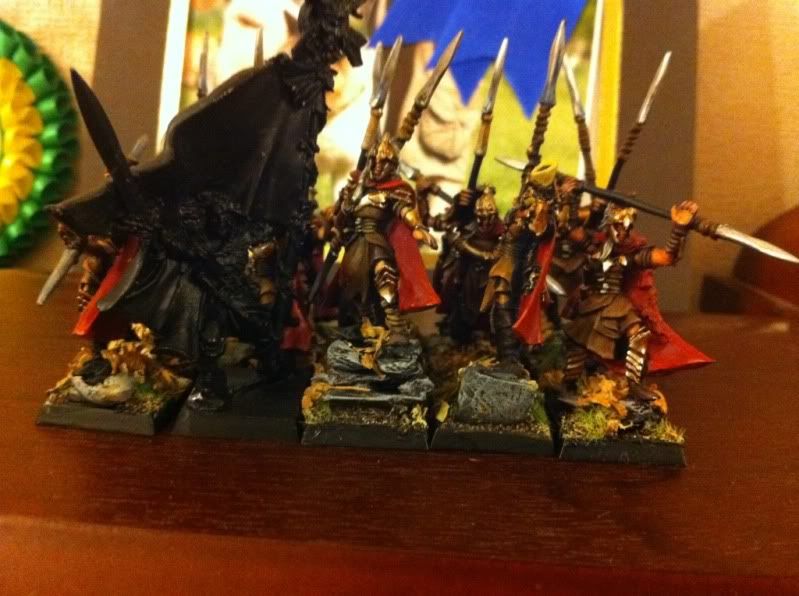
That gap will be filled by my army box BSB, who'll make a nice eternal standard.

More tomorrow
First, I've extended on of my units of glade guard from 10 to 16 strong, with command.
Also, 15 (actually 14 at the minute) eternal guard. 5 of these guys were the first models I painted for this army a few years back, hopefully you can't tell the new from the old too much
That gap will be filled by my army box BSB, who'll make a nice eternal standard.
More tomorrow
Sunday, 21 August 2011
Glade Guard additions
Uuurgh...it's late and I've done lots today.
Today has mostly consisted of stripping old models, but I've done some painting too.
Just one quick pic before bed, sorry about the light. One of my units of ten Glade Guard has been extended to sixteen, including command. Theyre almost finished, but I've left the champion out of the photo, he's a special surprise

Just need to finish the gold and the bases, then pick out a few details
Today has mostly consisted of stripping old models, but I've done some painting too.
Just one quick pic before bed, sorry about the light. One of my units of ten Glade Guard has been extended to sixteen, including command. Theyre almost finished, but I've left the champion out of the photo, he's a special surprise
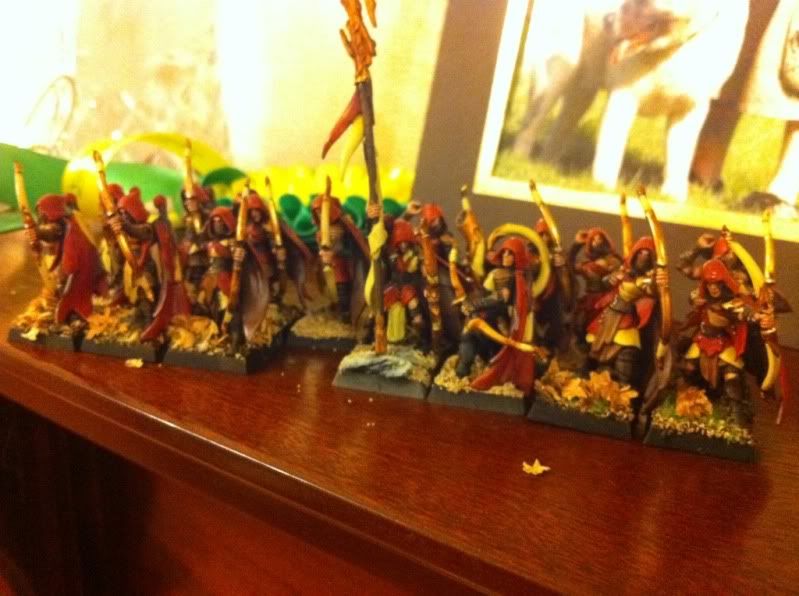
Just need to finish the gold and the bases, then pick out a few details
Thursday, 18 August 2011
Oakroot- Treeman finished
Tree men. You just can't ignore them forever. Sooner or later in your wood elf army you're going to have to give up and get one.
Unfortunately, despite it's incredible background, awesome rules, great character and war hammer pedigree, we are left with this.

This is what I used for my current Treeman. It's not a bad model. But it's not an army defining, kick ass model either. Way back in White dwarf 190, I first became aware of Wood Elves after an incredible battle report. I'd never seen them before, and the treeman drew me to the army, probably for life. If I did the same now with the current tree man, would I be just as inspired? Probably not. I hoped a quick paint job and a mighty base would solve his problems, but I was wrong. He looks OK, and that's not what I want.
Here's the unavoidable faults, In my opinion.
1) the expression. I want terror. I want faces in the bark created by your mind when you're scared at night in a forest. I want malice! I get a bobbed out Tongue and a smile.
2) the 'hips'. Think about a treemans movement. In your minds eye, surely he's either lurching, or stomping. Your mighty treeman can do neither with the centre of his 'hips' thrust forward like a disco menace. Coupled with the expression, he looks like your drunken uncle out on the pull.
3) no arms. The branches are cool, but he needs two identifiable arms. Durthu had the right idea with his angry fist.
It feels good to say all this, because as a GW staff member I had to defend every model to the hilt. I had to make out it was incredible. Not that it's without it's virtues, it's size was a welcome improvement, and the bark sculpting is lovely.
So without further ado, I hereby declare that I like the oooollllddd treemen best, and will be basing mine on this fellow.
The main issue is the size. Compared to the modern treeman, the classic sculpt is closer to a treekin in size. There are two sculpts, the first with his arm raised in the air, the second with his arms wide. I won one of each on eBay for a fair price, but by some fluke I ended up with two of the second sculpt. My original plan was to use the first sculpt, and his 'slam dunk' pose would help the size problem.
So, the second sculpt (actually my favourite of the two). Whilst waiting for it in the post, I had many grand ideas about resculpting a head etc, but when it arrived, I got to see how nice this model actually is. It has tons of bark, trunk, foliage, little details, and I realised I had to do very little to it.
All I did was two simple things to increase it's height and overall mightiness. First, a huge base! Second, I pinned on a couple of dryad branches and sculpted the joins to match.

He was an absolute joy to paint, and was instantly preferable to the modern version, who I remember being a bit of a chore. Here's the finished article, Oakroot, tree-guardian of Everfall.

How does he square up to his younger cousin?


Quite well I think!
Unfortunately, despite it's incredible background, awesome rules, great character and war hammer pedigree, we are left with this.

This is what I used for my current Treeman. It's not a bad model. But it's not an army defining, kick ass model either. Way back in White dwarf 190, I first became aware of Wood Elves after an incredible battle report. I'd never seen them before, and the treeman drew me to the army, probably for life. If I did the same now with the current tree man, would I be just as inspired? Probably not. I hoped a quick paint job and a mighty base would solve his problems, but I was wrong. He looks OK, and that's not what I want.
Here's the unavoidable faults, In my opinion.
1) the expression. I want terror. I want faces in the bark created by your mind when you're scared at night in a forest. I want malice! I get a bobbed out Tongue and a smile.
2) the 'hips'. Think about a treemans movement. In your minds eye, surely he's either lurching, or stomping. Your mighty treeman can do neither with the centre of his 'hips' thrust forward like a disco menace. Coupled with the expression, he looks like your drunken uncle out on the pull.
3) no arms. The branches are cool, but he needs two identifiable arms. Durthu had the right idea with his angry fist.
It feels good to say all this, because as a GW staff member I had to defend every model to the hilt. I had to make out it was incredible. Not that it's without it's virtues, it's size was a welcome improvement, and the bark sculpting is lovely.
So without further ado, I hereby declare that I like the oooollllddd treemen best, and will be basing mine on this fellow.
The main issue is the size. Compared to the modern treeman, the classic sculpt is closer to a treekin in size. There are two sculpts, the first with his arm raised in the air, the second with his arms wide. I won one of each on eBay for a fair price, but by some fluke I ended up with two of the second sculpt. My original plan was to use the first sculpt, and his 'slam dunk' pose would help the size problem.
So, the second sculpt (actually my favourite of the two). Whilst waiting for it in the post, I had many grand ideas about resculpting a head etc, but when it arrived, I got to see how nice this model actually is. It has tons of bark, trunk, foliage, little details, and I realised I had to do very little to it.
All I did was two simple things to increase it's height and overall mightiness. First, a huge base! Second, I pinned on a couple of dryad branches and sculpted the joins to match.
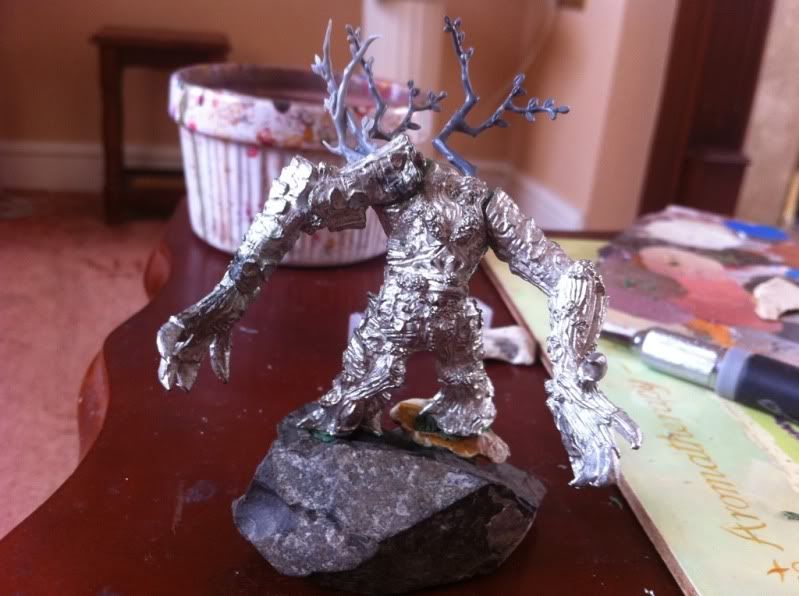
He was an absolute joy to paint, and was instantly preferable to the modern version, who I remember being a bit of a chore. Here's the finished article, Oakroot, tree-guardian of Everfall.
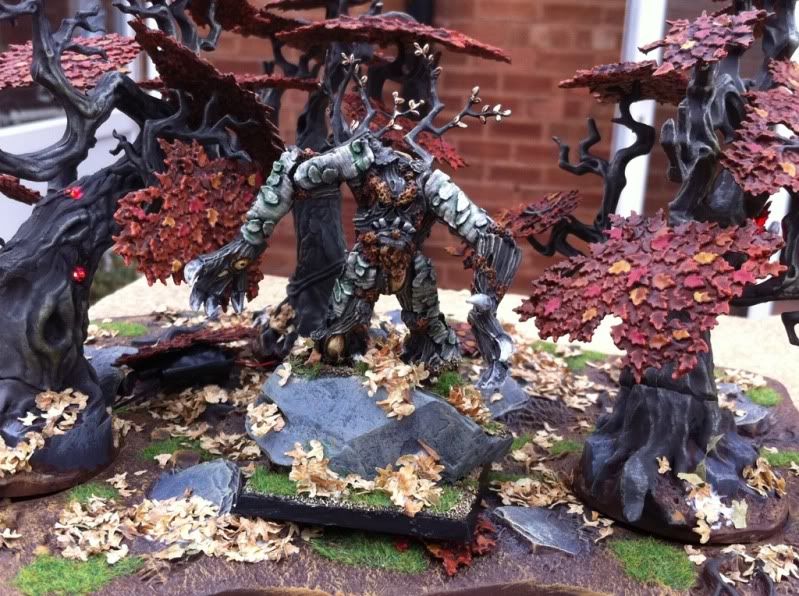
How does he square up to his younger cousin?
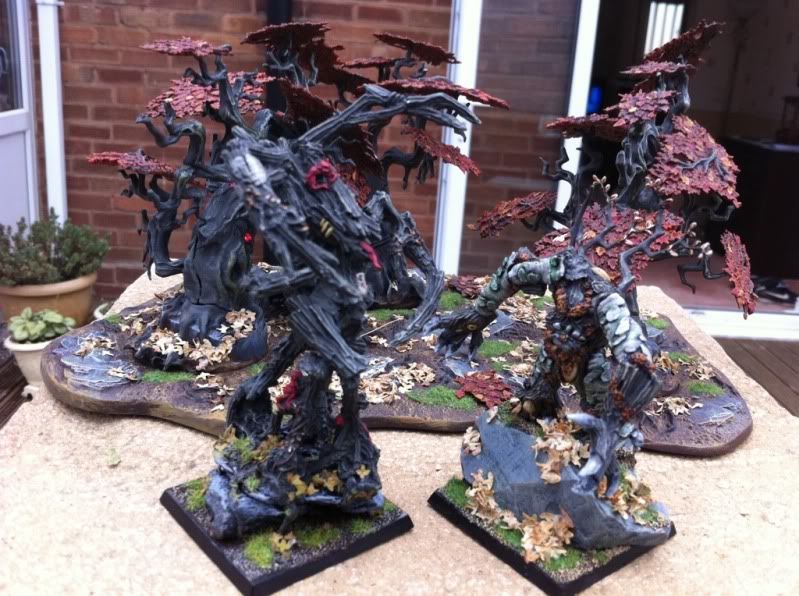
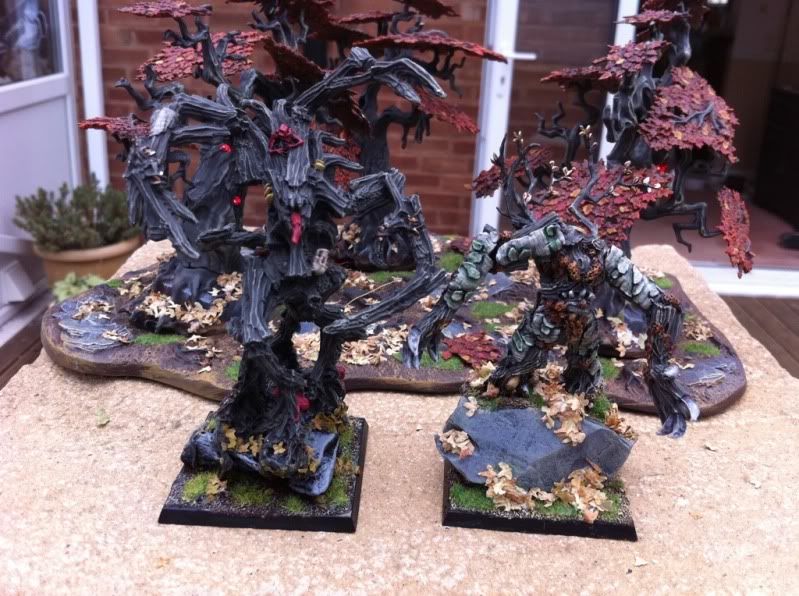
Quite well I think!
Dragon finished!
He's finished!
As with all my models I'll come back to him in a month or so and touch up any bits I'm notbappy with. I find a rested pair of eyes helps a lot. I can see already I'll have to do something with the spear tip


Looking back at the original, I think he looks a million times better. He looks important enough to ride a dragon now
As with all my models I'll come back to him in a month or so and touch up any bits I'm notbappy with. I find a rested pair of eyes helps a lot. I can see already I'll have to do something with the spear tip
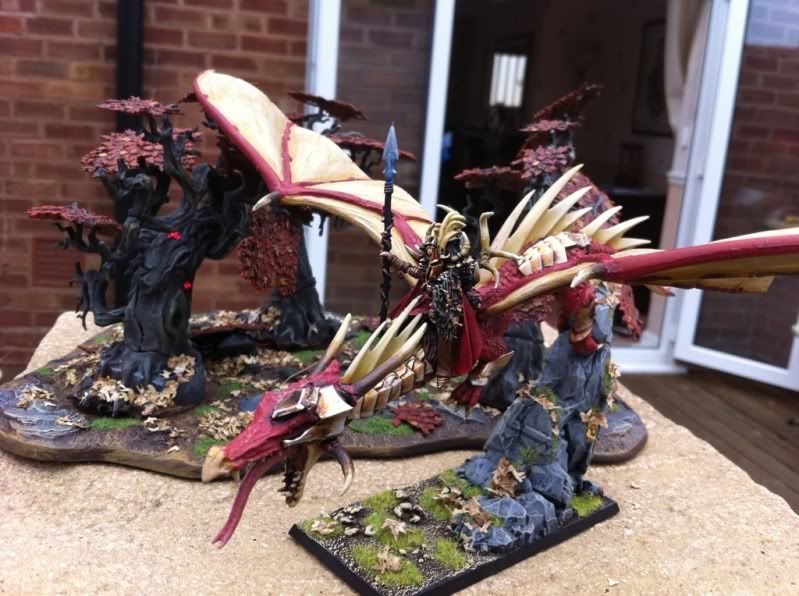
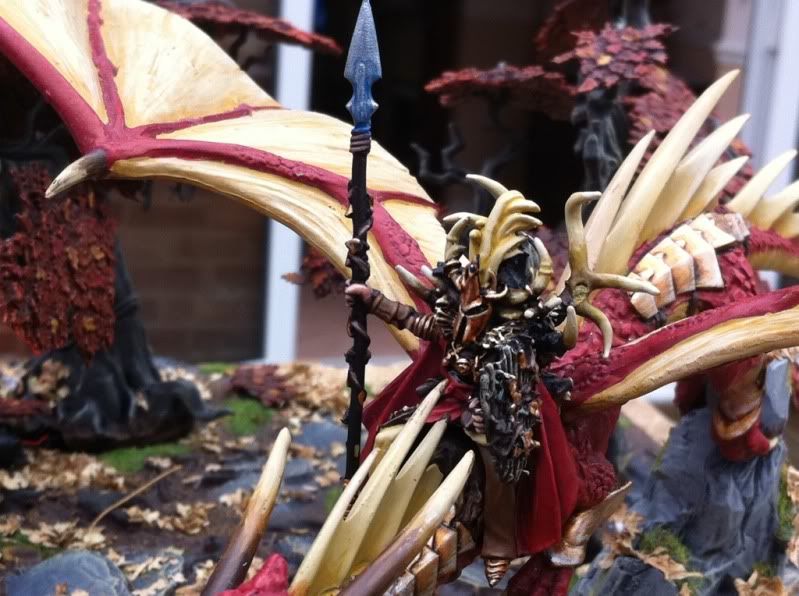
Looking back at the original, I think he looks a million times better. He looks important enough to ride a dragon now
Tuesday, 16 August 2011
Faerie Lights In The Forest
Hi guys, it's time for another tutorial. This time, I'm going to be looking at the Asrai wood. We all get one for free, so I feel like making mine a little different.
My inspiration comes mainly from music videos that are filmed in a forest at night with strobe lighting (cherub rock by smashing pumpkins and anything can happen in the next half hour being notable examples). So, imagine, if the spites of Athel Loren could lure in their next victims with strange, mystical lights.
For this project you need a set of LED circuits. I got mine from http://www.modeltrainsoftware.com , but to be honest I'd look around for better. I chose them as they were the first the found, but the wiring is a little flimsy and I ended up ruining one circuit as the wire was too brittle. Still, I got the job done, so if you can't find any better, use these guys. They sell pre-made battery and switch sets. I bought a couple of 3Vbatteries and switches, and several red 3V LED's. I also picked up a bit of PVC tape.

Simply enough, purchase a GW wood and clean up all the pieces with a craft knife. I leave the leaves where they are and paint them on the sprue.

Most of the trunk is hollow. I pick the spots I want my lights, and I make a little hole for them. Accomplish this by sticking a knife and twisting till the hole is made

Check your LED fits into the hole

Using the same technique, make a hole in the tree base and in the bottom of the trunk for the wires to pass through.

Using a ring of green stuff and superglue, fix it in place

Feed the wires through the hole, and glue the trunk halves together

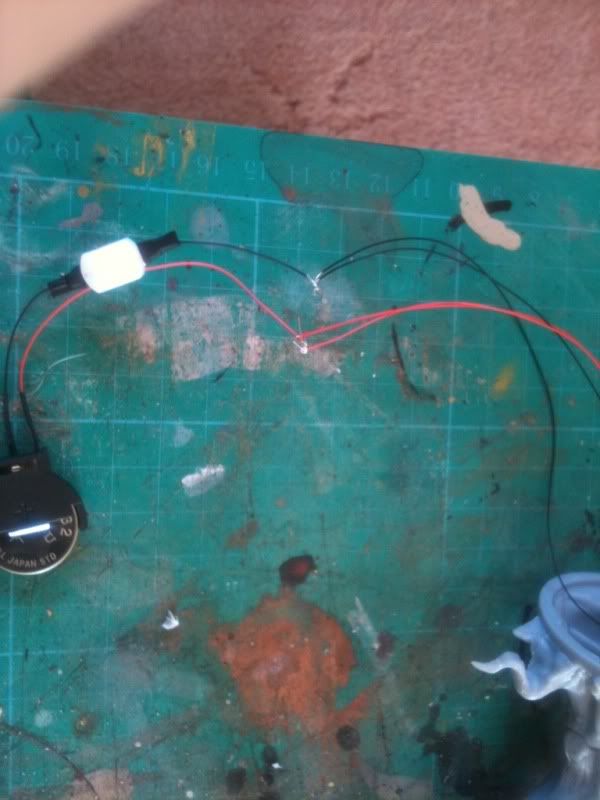
Join all the wiring up. This is straightforward enough with my pieces, red wire to red wire, black to black

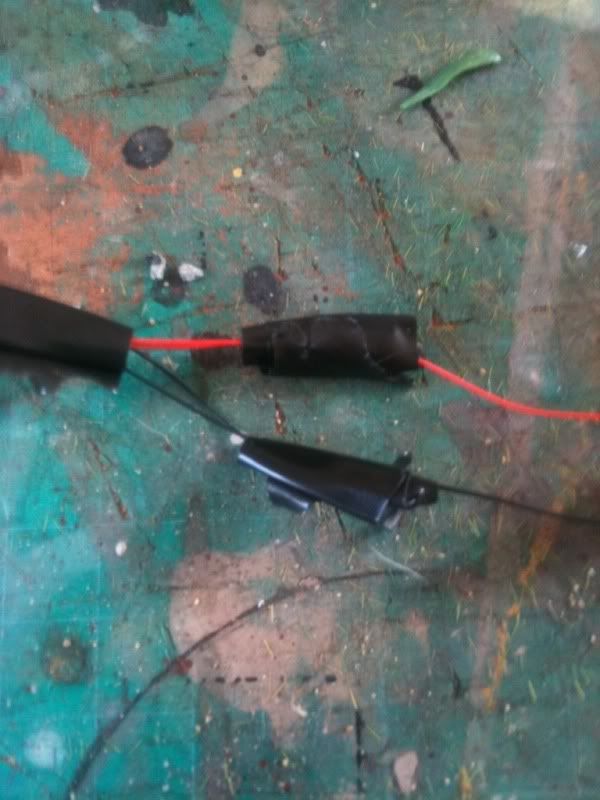
Seal up the joins with PVC tape

After that you just build and paint the wood as normal. I just did an autumn theme to match my army.
Here's some pics of the forest so far. I just need to finish the third tree and paint the bases of each tree.


You can't see in the pics cuz the light shows so bright, but it reflects off all the trunks and leaves, and looks very spooky.
Let me know what you think!
My inspiration comes mainly from music videos that are filmed in a forest at night with strobe lighting (cherub rock by smashing pumpkins and anything can happen in the next half hour being notable examples). So, imagine, if the spites of Athel Loren could lure in their next victims with strange, mystical lights.
For this project you need a set of LED circuits. I got mine from http://www.modeltrainsoftware.com , but to be honest I'd look around for better. I chose them as they were the first the found, but the wiring is a little flimsy and I ended up ruining one circuit as the wire was too brittle. Still, I got the job done, so if you can't find any better, use these guys. They sell pre-made battery and switch sets. I bought a couple of 3Vbatteries and switches, and several red 3V LED's. I also picked up a bit of PVC tape.
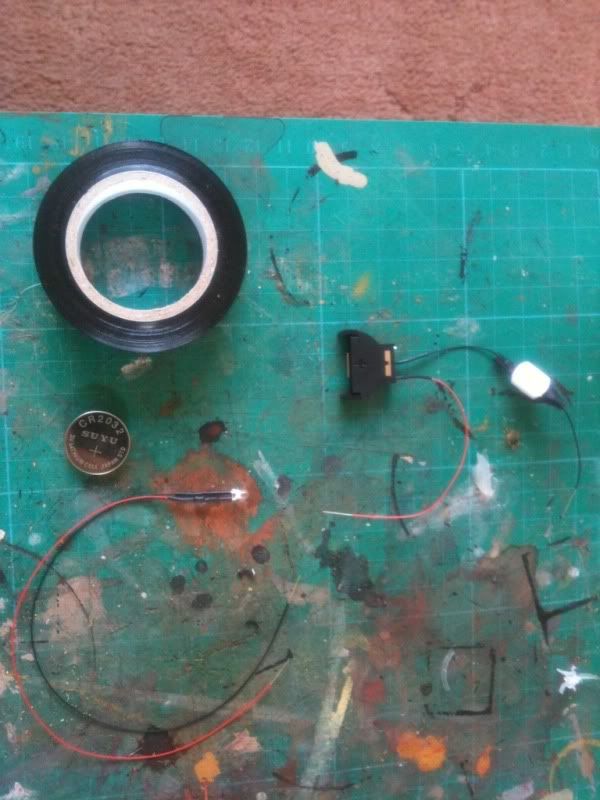
Simply enough, purchase a GW wood and clean up all the pieces with a craft knife. I leave the leaves where they are and paint them on the sprue.
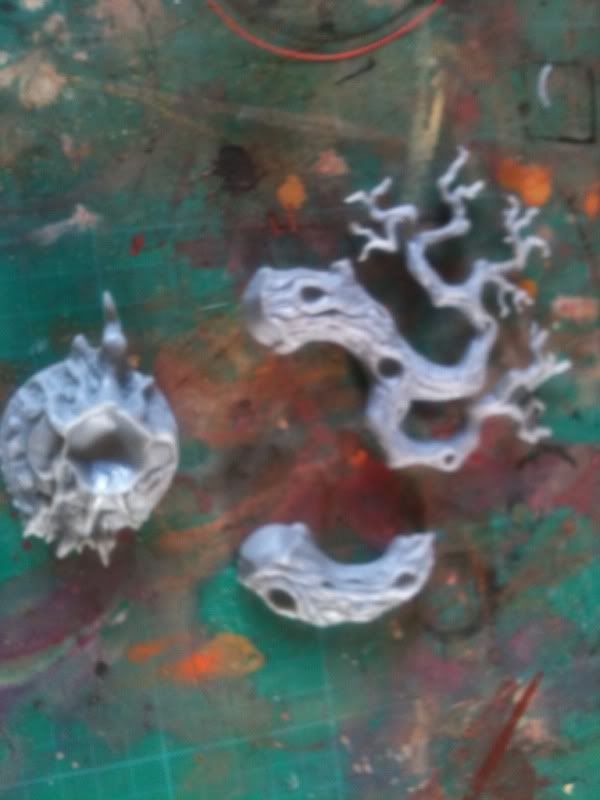
Most of the trunk is hollow. I pick the spots I want my lights, and I make a little hole for them. Accomplish this by sticking a knife and twisting till the hole is made
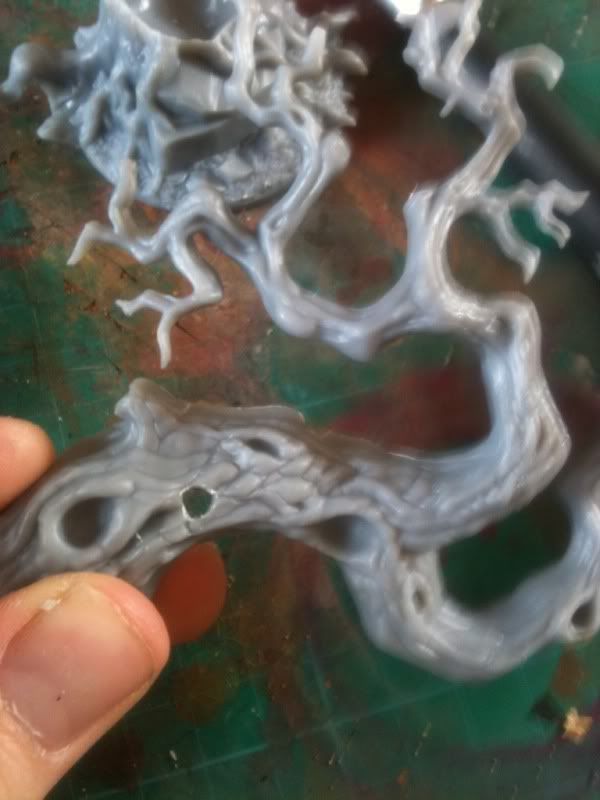
Check your LED fits into the hole
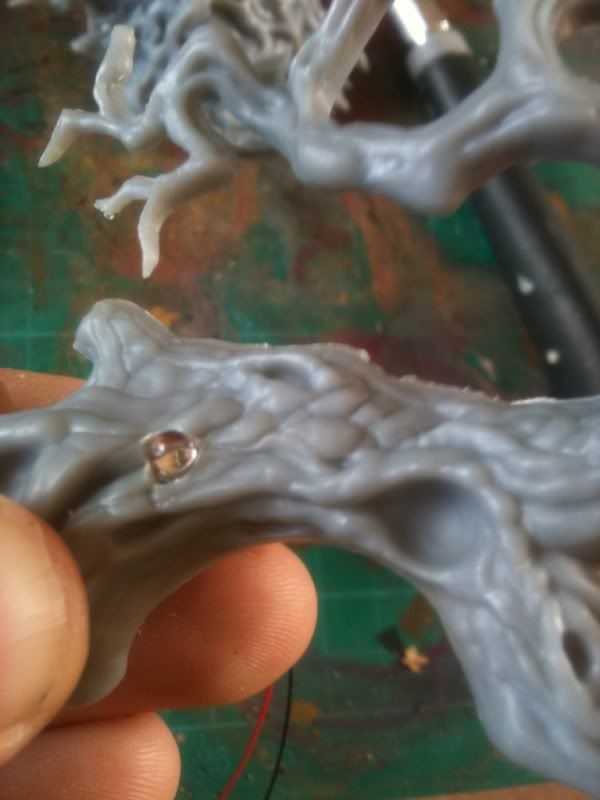
Using the same technique, make a hole in the tree base and in the bottom of the trunk for the wires to pass through.
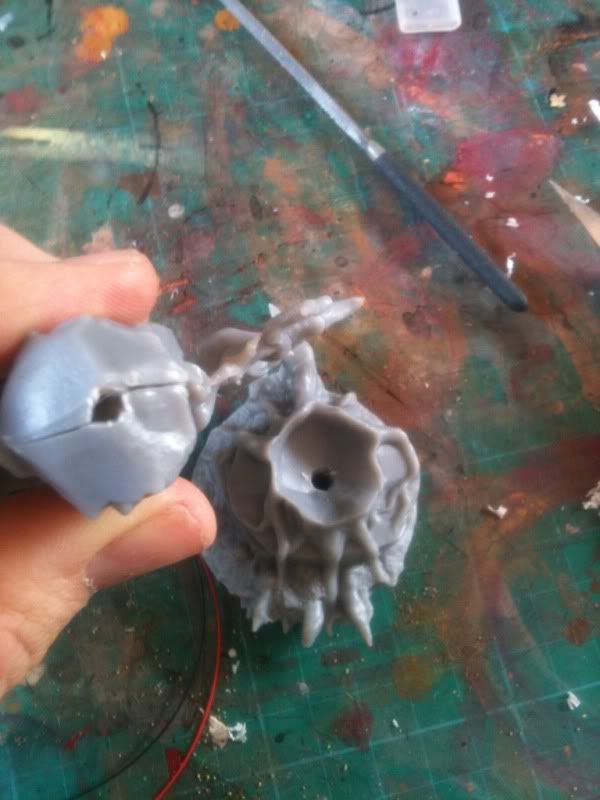
Using a ring of green stuff and superglue, fix it in place
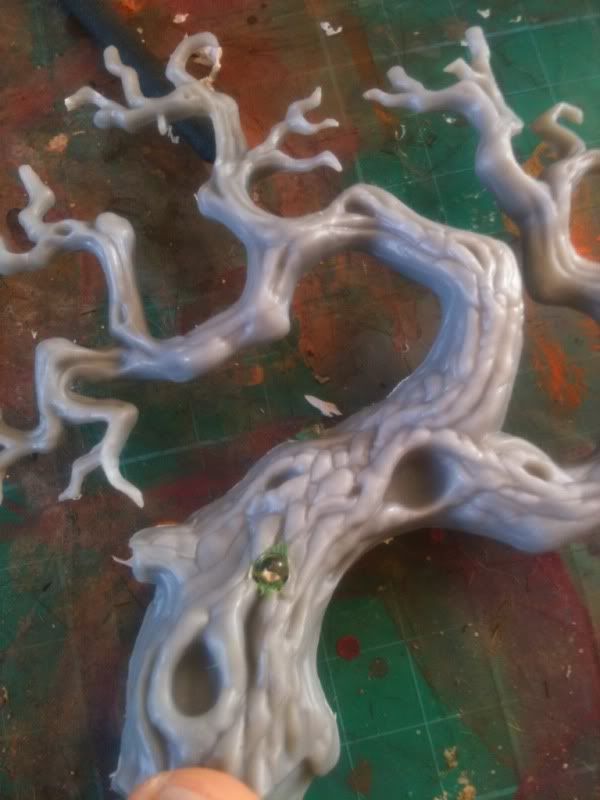
Feed the wires through the hole, and glue the trunk halves together
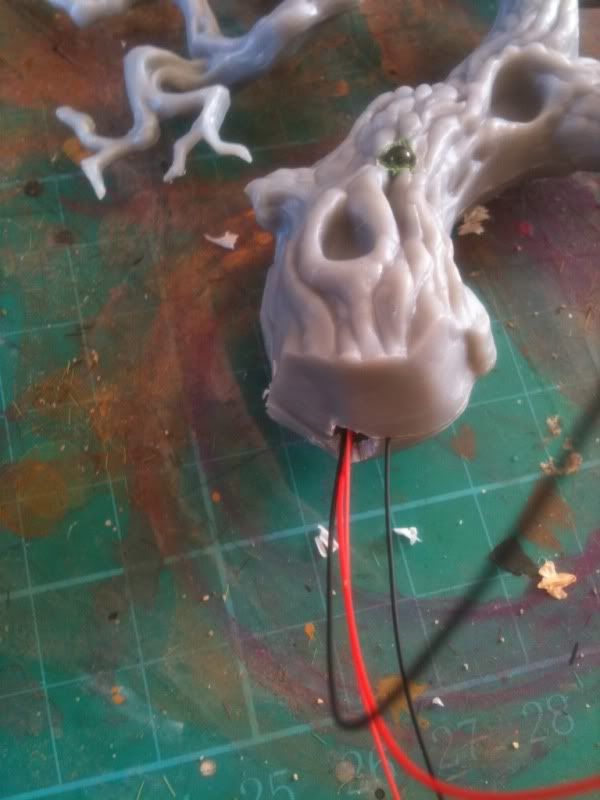
Join all the wiring up. This is straightforward enough with my pieces, red wire to red wire, black to black
Seal up the joins with PVC tape
After that you just build and paint the wood as normal. I just did an autumn theme to match my army.
Here's some pics of the forest so far. I just need to finish the third tree and paint the bases of each tree.
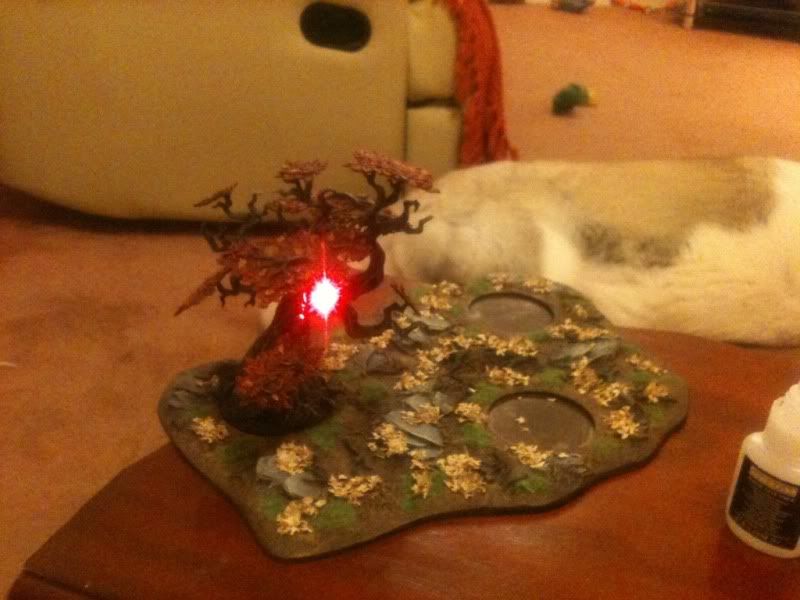
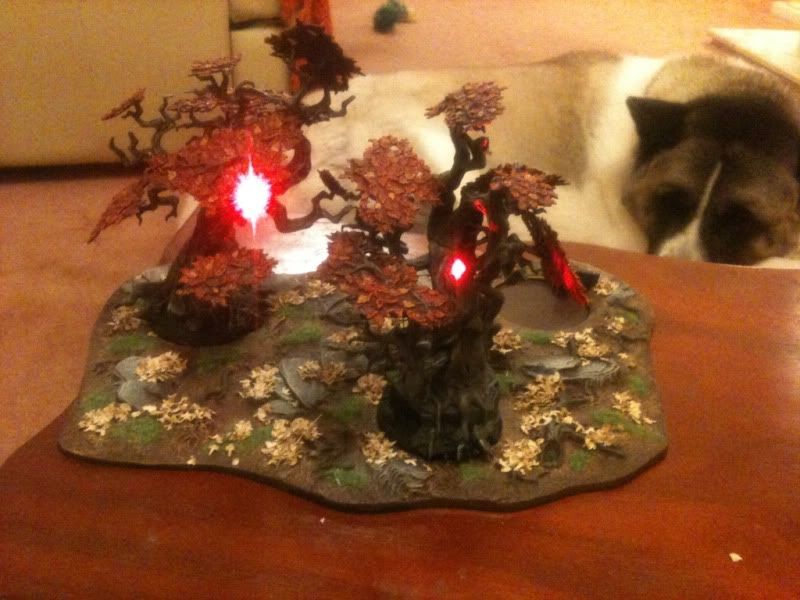
You can't see in the pics cuz the light shows so bright, but it reflects off all the trunks and leaves, and looks very spooky.
Let me know what you think!
Subscribe to:
Posts (Atom)